Getting Started: Vendor Registration & Profile Setup
Before using the modules, you need to create your account and setup your business profile to ensure all documents are branded with your company details.
- Create Account: Click on the Sign Up button. Enter your Full Name, Email, Mobile Number, and create a strong Password.
- Verify Email/OTP: Complete the verification process if prompted, to secure your account.
- Login to Dashboard: Once registered, log in to access your main dashboard.
- Complete Your Profile: Click on 'My Profile' in the sidebar or top menu. Here, upload your Company Logo, and fill in your Business Name, GSTIN, and Office Address. (Note: All invoices, proposals, and agreements will automatically pull your logo and address from here).

1. Workspace & Staff Management
Efficiently manage your team and track their daily activities across your nationwide operations.
- Staff Onboarding: Navigate to the 'Workspace Staff' module and add your team members, including sales agents and installation technicians.
- Attendance Tracking: Use the digital attendance log to mark daily presence (Present, Absent, Leave, Half-Day).
- Performance Reports: Generate monthly attendance and activity reports to evaluate team productivity.
- Referral Integration: Link staff members to specific leads to track sales performance and calculate commissions.
Staff Management Dashboard
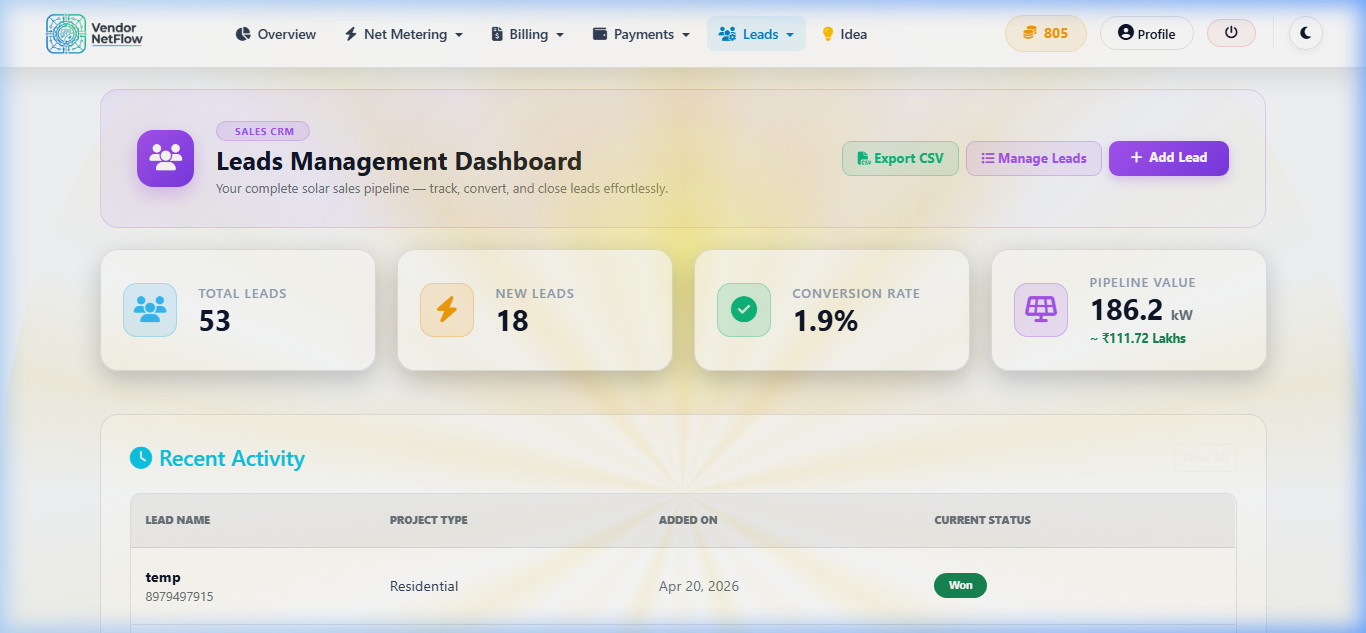
2. Leads CRM Dashboard
Manage your entire sales pipeline from a new inquiry to a closed deal, ensuring no customer is left behind.
- Add New Leads Manually: Go to the 'Leads Dashboard' and click the '+ Add Lead' button. Fill in the consumer's Name, Phone Number, required kW Capacity, State, and District.
- Track Progress via Kanban Board: Easily drag and drop leads across different stages: New → Contacted → Site Visit → Proposal Sent → Won/Lost.
- Auto-Capture via Public Portal: Find your unique 'Public Lead Form Link' at the top of the Leads page. Share this link on WhatsApp or Facebook. Whenever a customer fills out this form, their details instantly appear in your 'New Leads' column.
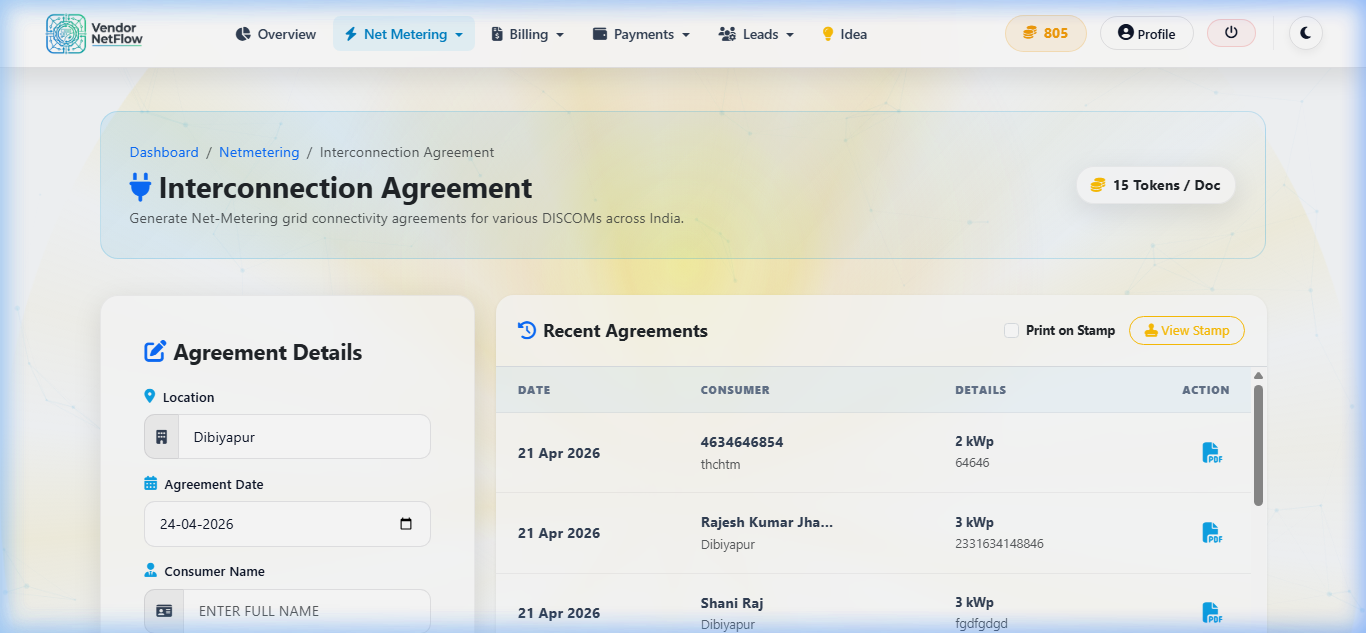
3. Net Metering / DISCOM Automation
Instantly generate error-free, state-specific Net Metering agreements without manual MS Word formatting.
- Navigate to Module: Click on 'Net Metering' in the sidebar menu.
- Select DISCOM: Choose your specific electricity provider from the dropdown list (e.g., PVVNL, DVVNL, MVVNL).
- Fill Consumer Info: Enter the Consumer Number, Applicant Name, Father's Name, Mobile, and exact Installation Address.
- Add Technical Specs: Input the Sanctioned Load (kW), Proposed Solar Capacity (kW), and Tariff Category (Domestic/Commercial).
- Generate PDF: Click 'Generate Agreement'. The platform will automatically insert your vendor details and the consumer's details into the official DISCOM format, ready for stamp paper printing.
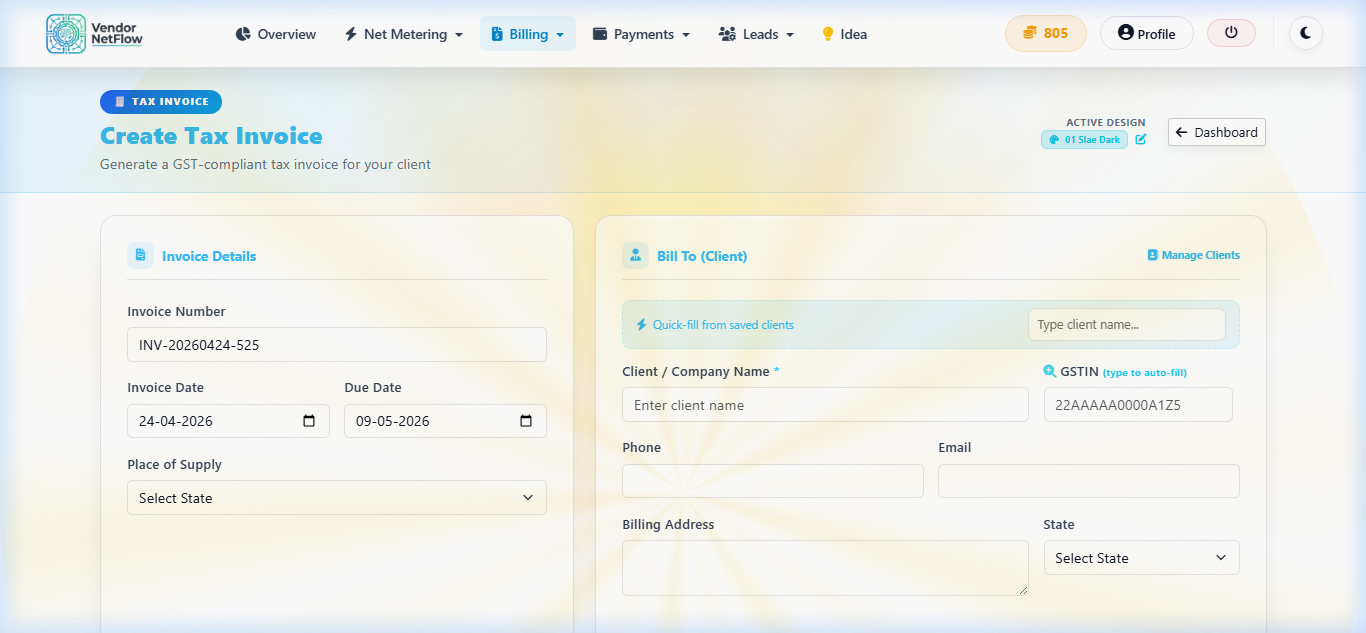
4. Advanced GST Billing CRM
Create professional Tax Invoices, Quotations, and Proformas that make your business look enterprise-grade.
- Setup Clients: Go to the 'Clients' tab under 'Billing'. Click 'Add Client', enter their GSTIN (to auto-fetch details) or manually type their billing and shipping address.
- Create Document: Navigate to 'Invoices' or 'Quotations' and click 'Create New'. Select the saved client from the dropdown.
- Add Line Items: Add products like Solar Panels, Inverters, and BOS. Enter the quantity and unit rate.
- Auto Tax Calculation: Select the GST slab (e.g., 13.8% or 18%). The system automatically splits it into CGST and SGST and calculates totals.
- Download & Share: Click 'Save & Generate PDF' to get a beautifully formatted Tax Invoice containing your logo and bank details.
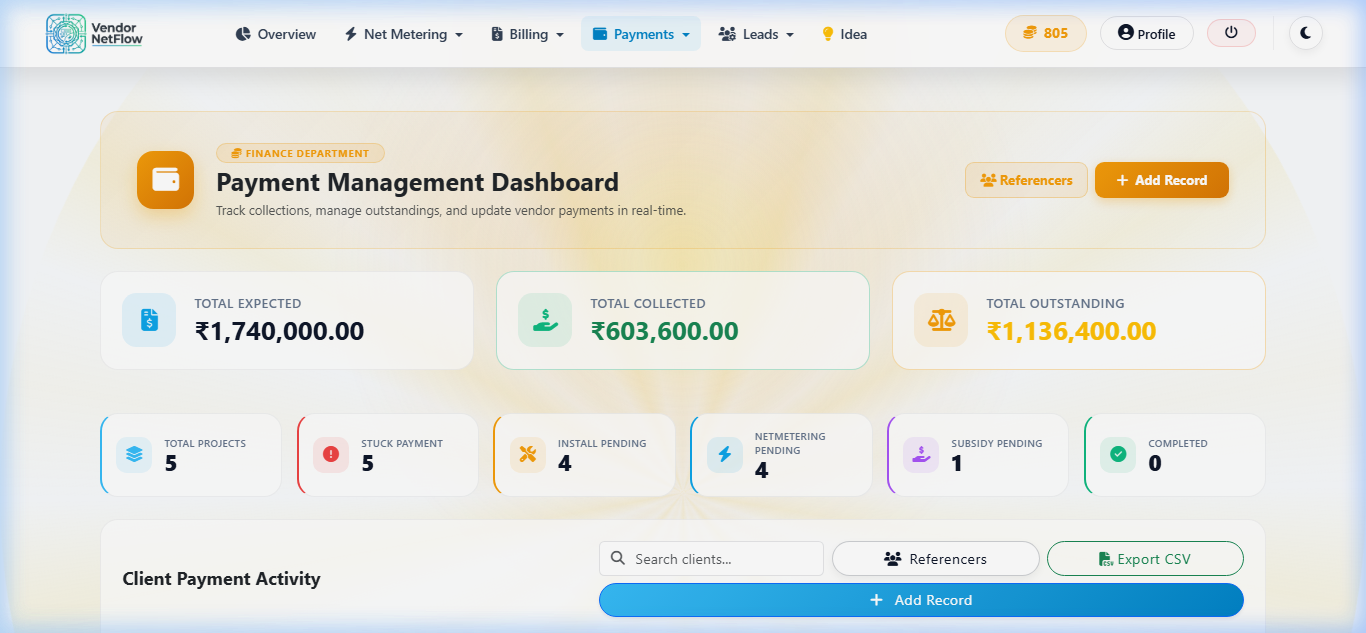
5. Payment Management Dashboard
Keep a close eye on project lifecycles, pending payments, and agent commissions.
- Create a Project Ledger: In the 'Payments' module, define a new project with its Total Contract Value.
- Track Milestones: Record payments against stages like 'Advance Booking', 'Material Delivery', 'Installation', and 'Subsidy Received'.
- Real-Time Financial Overview: The dashboard will visually show you 'Total Received' vs 'Pending Balance' across all your active projects.
- Agent Commissions: Assign a Referencer or Agent to the project and track their commission payouts separately to maintain clear financials.
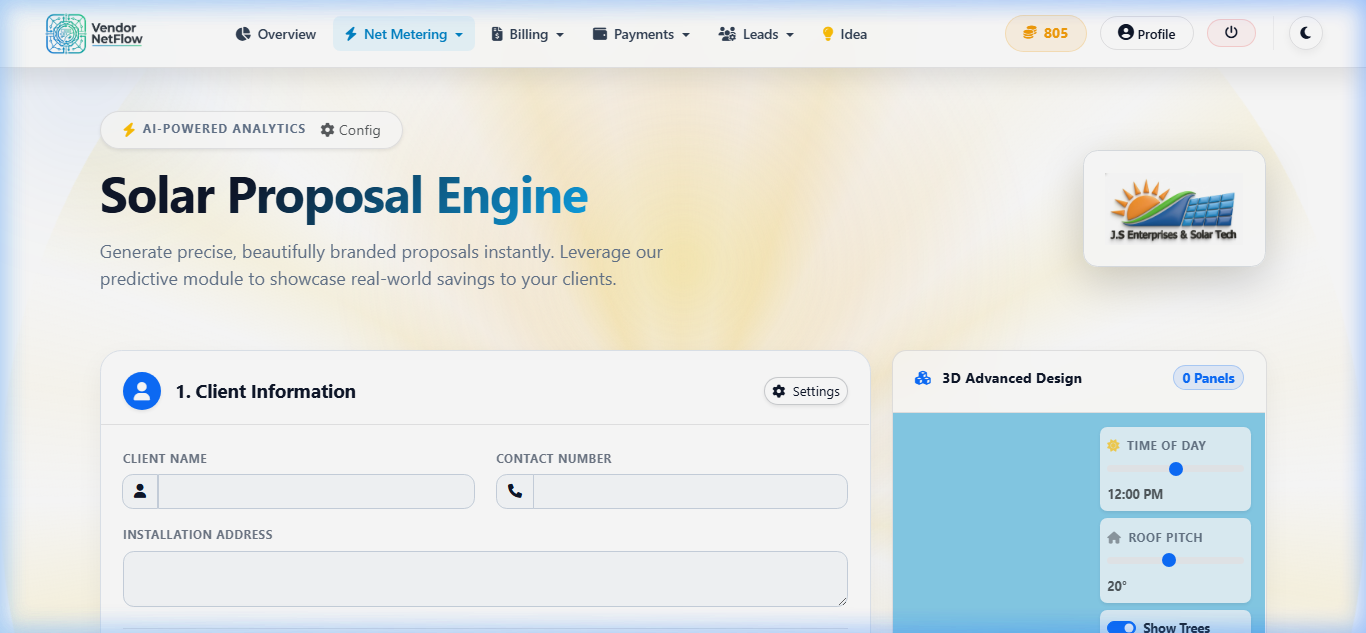
6. Solar Proposal Generator
Create stunning, branded 3D ROI proposals to convince clients visually and financially.
- Initial Settings: Under 'Proposal Settings', input your custom notes, terms and conditions, and upload a high-res company logo.
- Input Client Metrics: Click 'New Proposal'. Enter the Customer Name, their Current Monthly Bill (₹), and the Proposed System Size (kW).
- Financials: Enter the cost per watt or total turn-key cost.
- Auto-Calculations: The system computes the estimated annual generation, environmental impact (trees planted, CO2 saved), and the exact Payback Period (ROI).
- Export Premium PDF: Generate a multi-page, visually impressive PDF proposal to immediately share with the client.
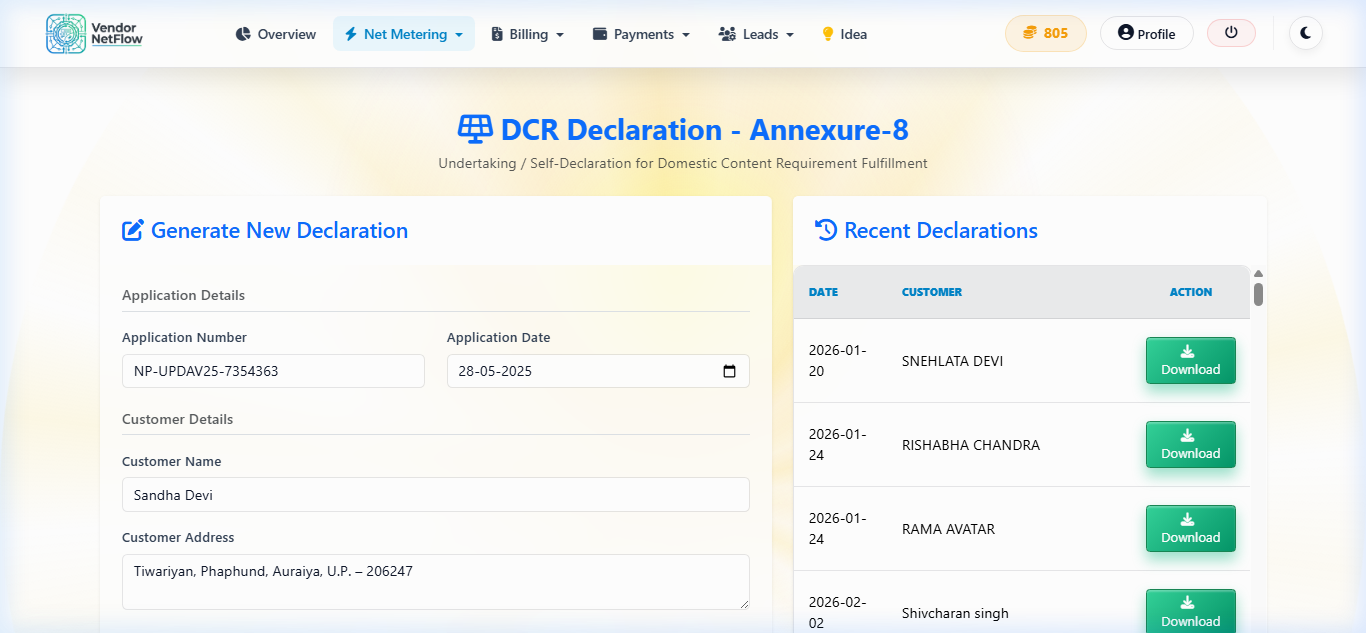
7. DCR Declaration (Annexure 8)
Generate 100% MNRE compliant DCR declarations to guarantee PM Surya Ghar subsidy approval without rejections.
- Open the Module: Navigate to 'DCR Declaration' under the Net Metering menu.
- Enter Consumer Data: Provide the National Portal Application Number, Consumer Name, Address, and Discom details.
- Solar Panel Specs: Enter the Manufacturer Name, Model Number, Wattage, and the exact count of ALMM DCR modules.
- Inverter Specs: Input the Inverter Make, Model, and Capacity.
- Generate & Sign: The system perfectly aligns this data onto the official 4-page PM Surya Ghar Make-in-India declaration. Print, stamp, sign, and upload!
8. Annexures 1 & 3 Forms
Quickly generate standard application and work completion reports required by state nodal agencies (like UPNEDA) and DISCOMs.
- Select Form Type: Choose whether you need Annexure 1 (Initial Application) or Annexure 3 (Work Completion Undertaking).
- Fill the Form: The UI will prompt you for consumer details, existing meter specifics, and solar plant technical configurations.
- Download PDF: Click 'Generate PDF' to instantly get the government-approved formatted document, completely bypassing Microsoft Word formatting struggles.
9. Warranty Certificate System
Build immense trust by issuing secure AMC and performance warranty certificates with QR code verification.
- Create New Certificate: Go to 'Warranty Certificates' and click 'New'. Enter customer details and the Commissioning Date.
- Log Components: Carefully enter the specific Serial Numbers of the installed panels and inverters for traceability.
- Generate QR Code: The system creates a beautiful PDF certificate containing a unique, scannable QR code.
- Client Verification: Provide the printed certificate to the client. When they scan the QR code with their phone, it opens a secure, online verification page proving the authenticity of their 5-year and 25-year warranties.

10. Serial Number Declaration Tool
Format bulk serial numbers exactly to MNRE portal specifications, avoiding upload errors.
- Bulk Paste Data: Go to the 'Serial Number Tool'. Copy your panel serial numbers from the manufacturer's invoice/Excel sheet and paste them directly into the text box.
- Auto-Format: Click Process. The system will automatically clean the data, remove trailing spaces, and format it exactly according to MNRE strict guidelines.
- Export for MNRE: Download the validated file, which is now ready for a flawless one-click upload to the national portal.
Bulk Data Processing Tool
11. Registered Vendor Directory
Boost your online presence and get organic leads with a public SEO-optimized vendor profile.
- Find Your Profile: Navigate to the 'Registered Vendors' public directory. Search for your company name or District.
- Claim Business: Click 'Claim Profile'. You will be asked to verify your official email (the one registered with UPNEDA/MNRE) via an OTP flow.
- Enhance Your Listing: Once claimed, update your profile photo, business description, and exact contact details.
- Get Discovered: Your optimized profile will help your business rank higher on Google for local solar searches, bringing direct consumer inquiries to your phone.

12. Solar Tools & Calculators Suite
Utilize our interactive, public-facing calculators to attract leads and close sales instantly in front of the customer.
System Size Calc
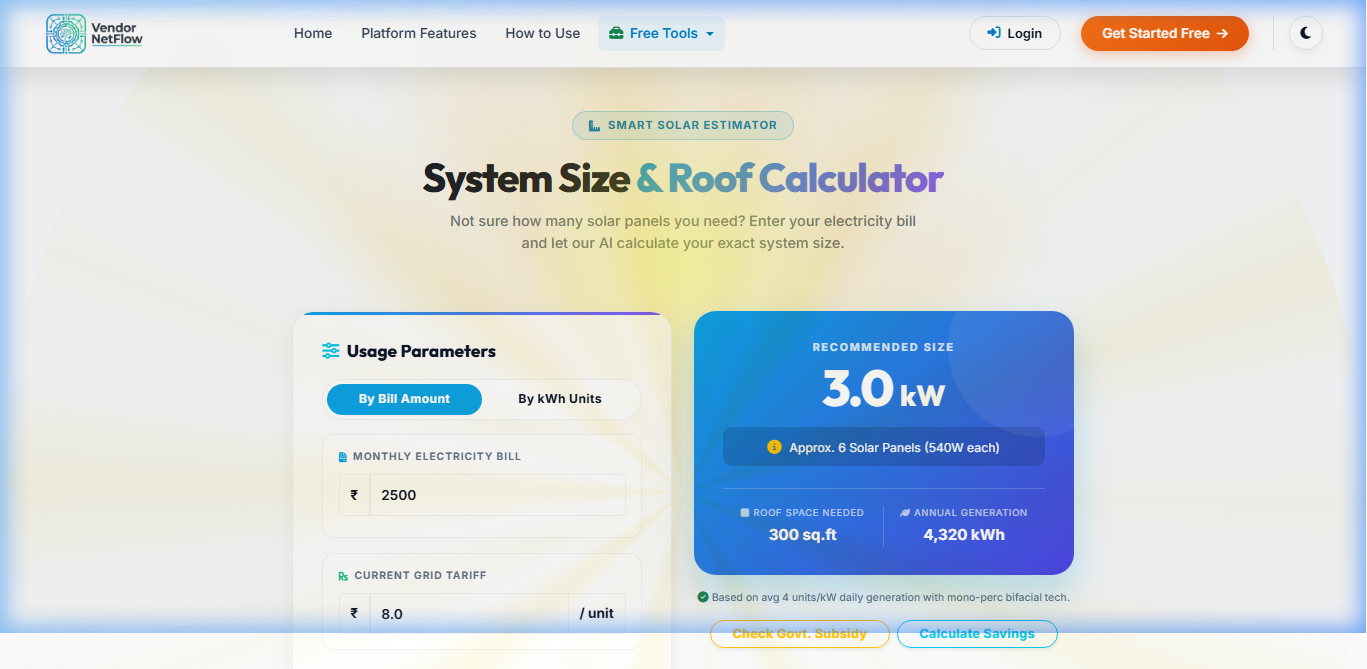
Enter the customer's monthly electricity bill (e.g., ₹2500), and it instantly calculates how many kW are needed to bring the bill to zero.
Subsidy Calc
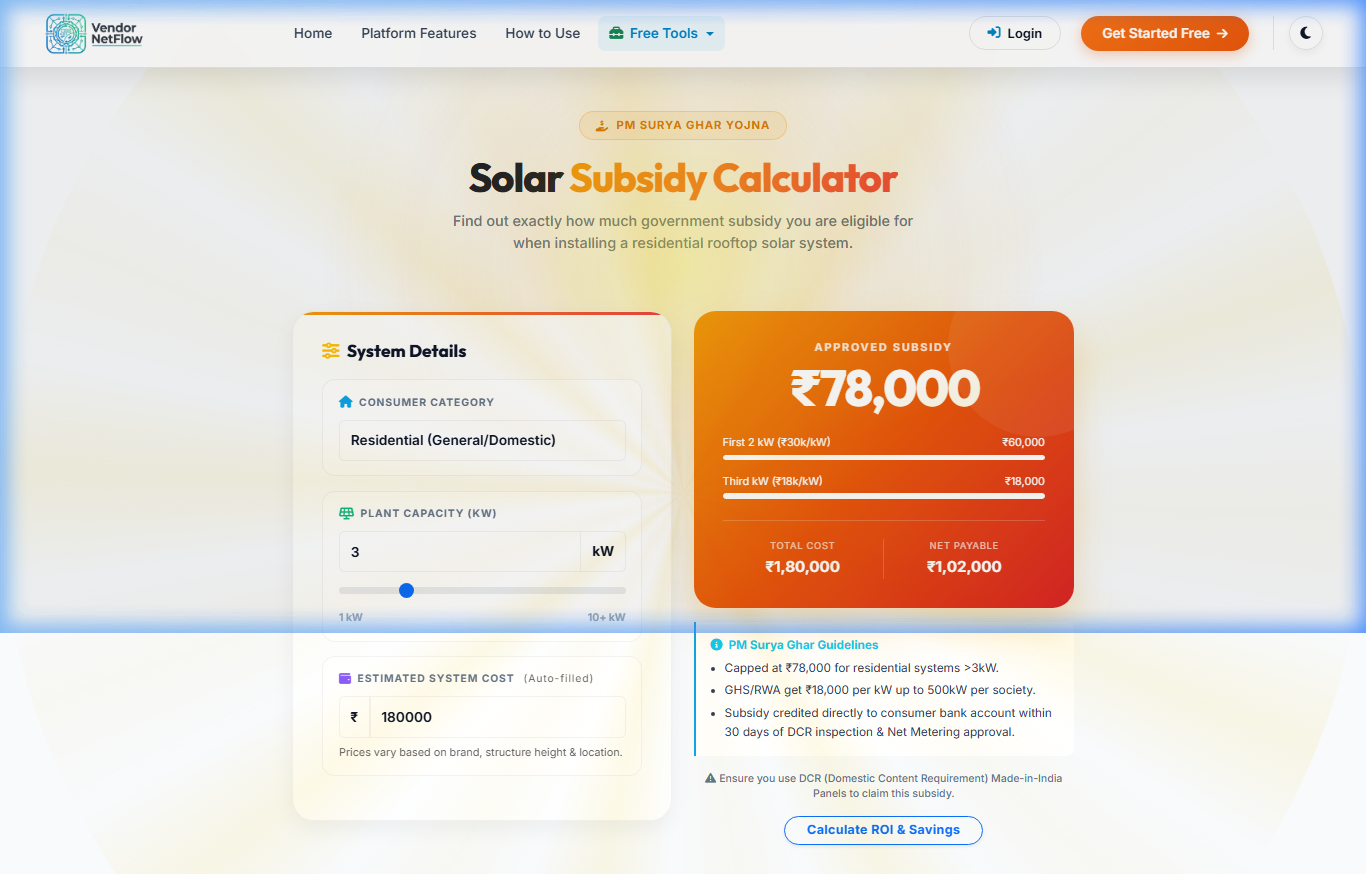
Select the proposed system size (1kW to 10kW), and it shows the exact PM Surya Ghar subsidy amount the customer will receive directly.
ROI Calculator
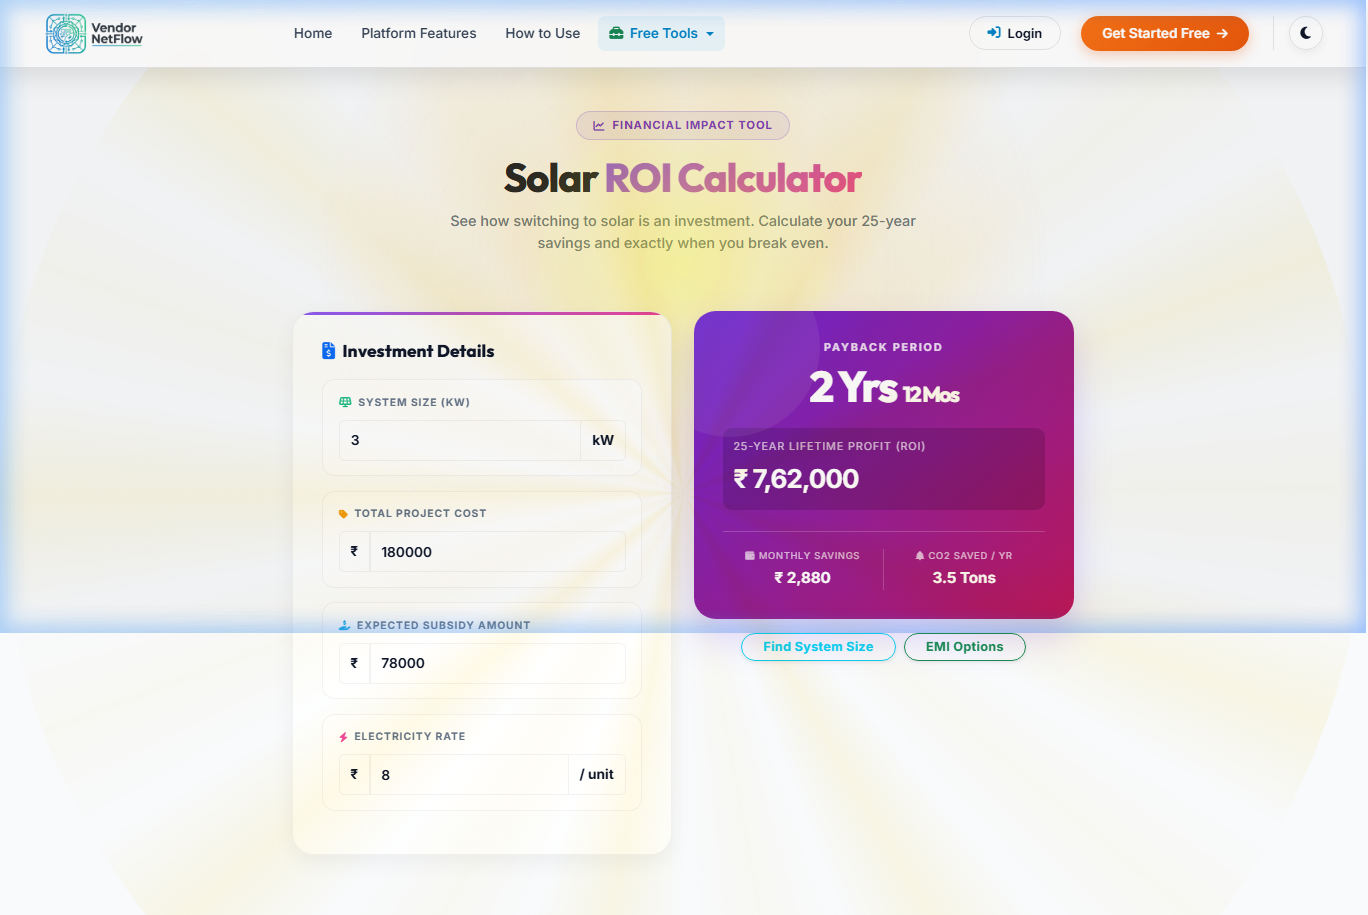
Input the total system cost and generation capacity. It calculates the Payback Period (years) and total lifetime savings (25 years).
EMI Calculator
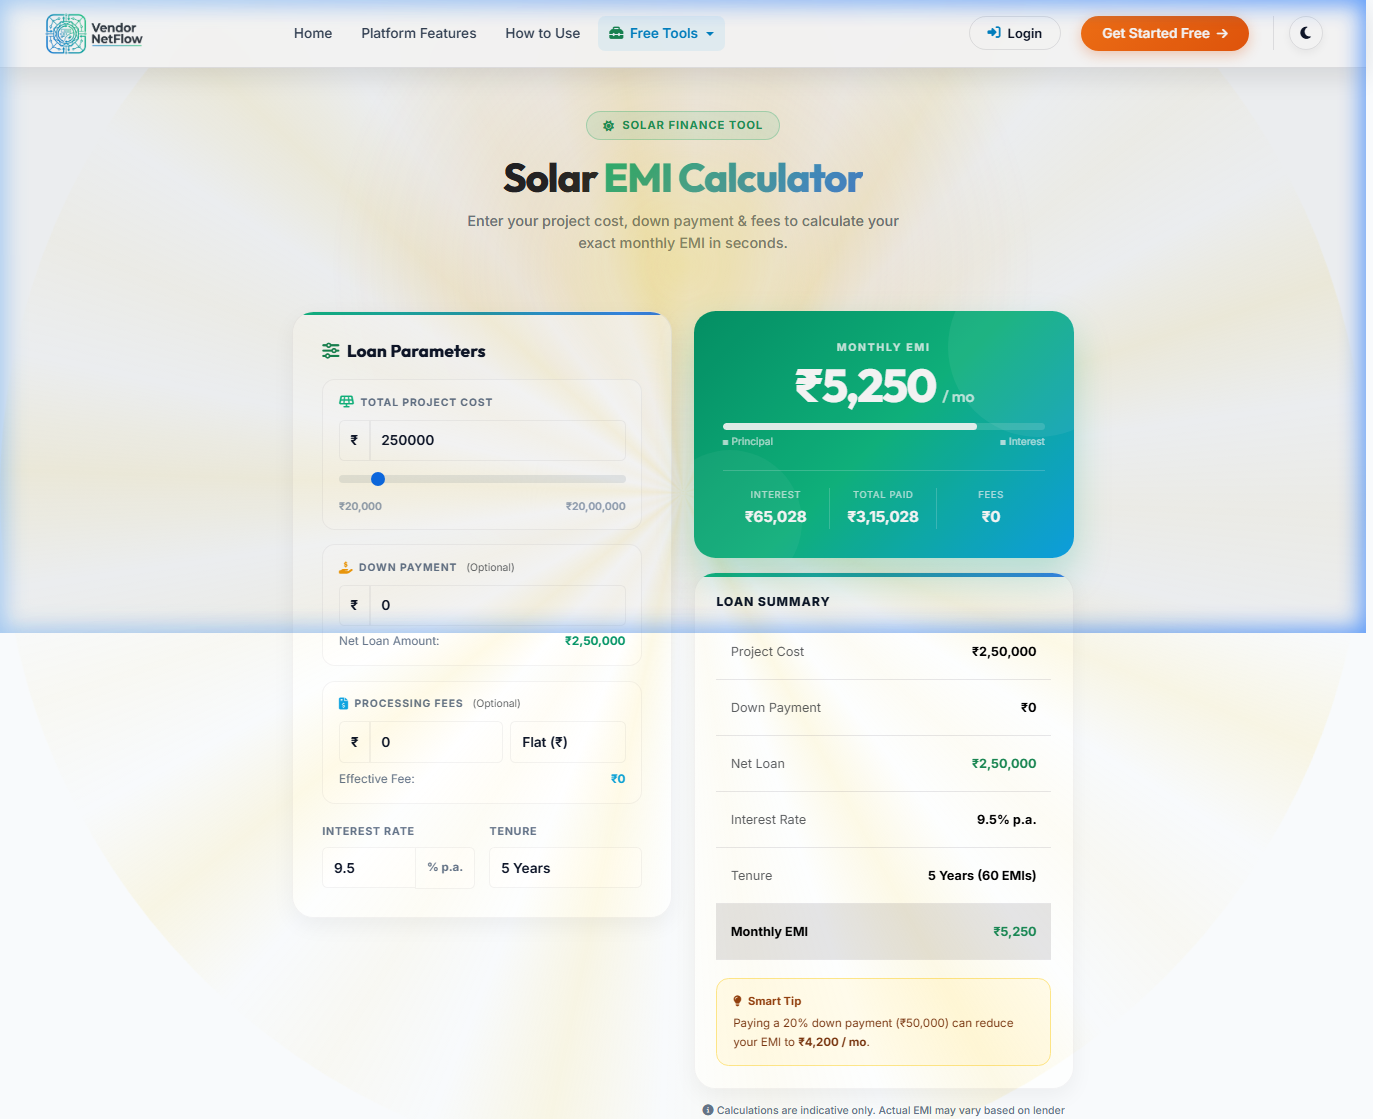
If financing, enter the loan amount, interest rate (e.g., 7% Jan Samarth), and tenure. It instantly calculates the monthly EMI.